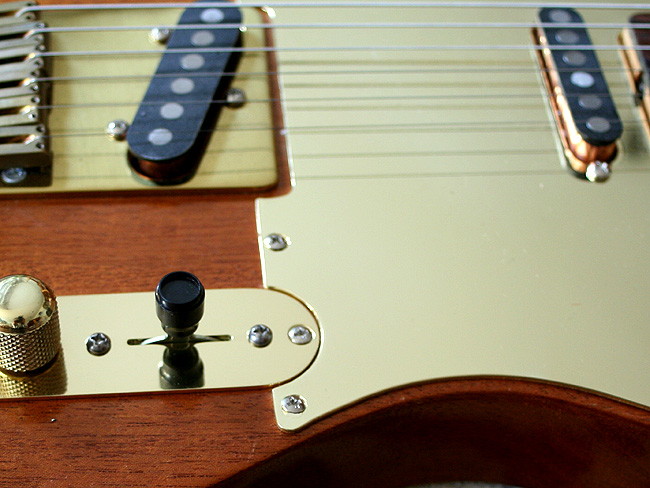
It is a while ago that I started my Tele Dream Machine project. The project advanced and got to a stage where I had a playable fine instrument some months ago (which can be seen e.g. here when I was demoing the Walk of Life pickups with this guitar). However, various parts were not finished yet, mainly as I was missing some of the required brass parts. Meanwhile I have (almost) all I need to finish the project.
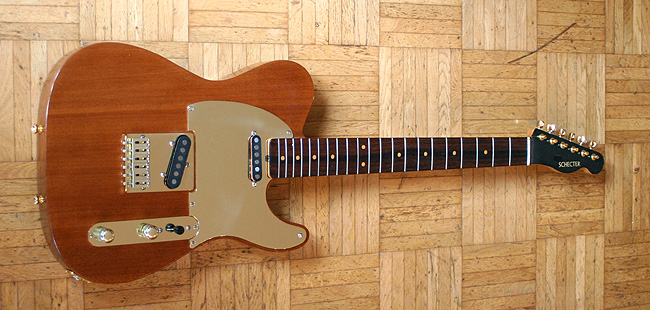
Let’s start with the control plate. The one you can see in the demo video was a gold-plated one, bought rather cheap on ebay. Unfortunately it did not fit properly into the contour of the pickguard but even overlapped the pickguard (see picture).
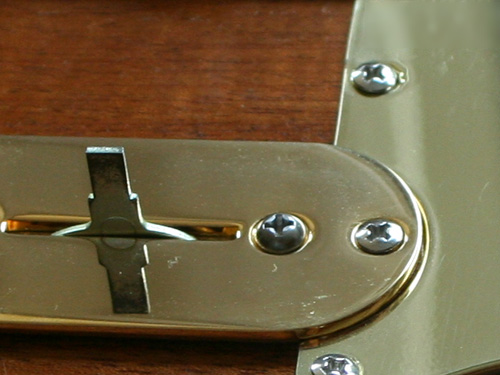
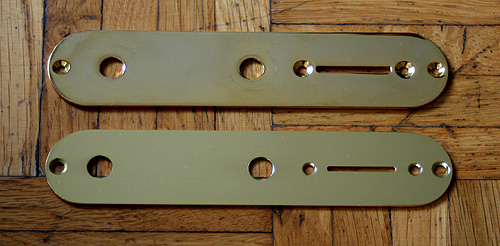
Was my brass Tele pickguard wrong or the plate too wide? Of course it was the plate, what shows us that you can never trust no-name products to be compatible to the standard specs. Besides, the gold-plated steel looks a bit different than the polished brass on Van Nuy era Schecter Dream Machines. Well, if I can produce brass pickguards I should be able to produce brass control plates I thought, and this is what I did. I made a few more, and chrome-plated some of them to go along with my white aluminium Tele pickguards for a real “Walk of Life red Tele clone” set (with pickups, pickguard and wired controls, coming very soon, I basically only have to take some pictures to put it into the online shop). By the way, it is not that you cannot get chrome-plated ones everywhere, but try to find one of chrome-plated brass instead of steel … – and it has to be brass for an “authentic” Dream Machine clone!
So here is the picture with my brass control plate. I also added the switch tip button (which was missing on the video): Schecter had these round black Tele buttons, but occasionally also Strat-style tips of brass.
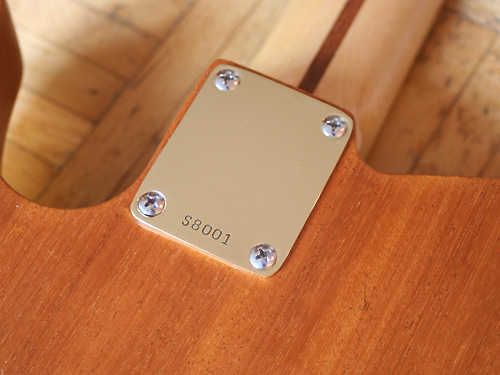
While doing the brass plates, I also made the serial number plates, of chrome-plated brass and – brandnew – polished brass, vintage-correct clear laquer coated, with the S8001 serial number. I replaced the gold-plated steel plate I had on the guitar (without any number) with this one for the vintage-correct look, with an S serial number of the correct size, font, and at the correct position.
Please note that I only made these with three serial numbers of Mark’s most famous Dream Machines (red Strat, red Tele, sunburst Strat, plus the two red Dire Straits Fender Strats ), no other numbers are available, or will be. The idea here is to have the right-looking part without a danger of misuse, not providing the possibility to fake a Dream Machine and sell it as original. I mean faking one and insstalling one of the most famous serial numbers is like faking a pre-CBS Strat and give it the 0001 serial number of David Gilmour’s famous blonde Strat – cannot fool anyone.
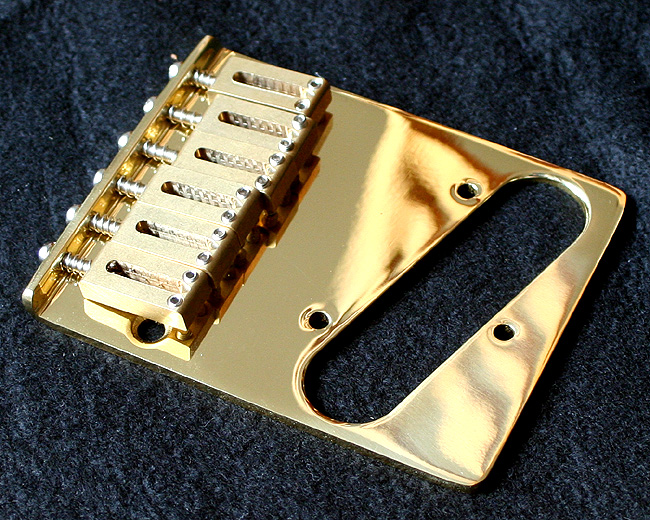
The next thing I did was to replace the original vintage NOS Schecter bridge that I bought for a fortune a while ago with one of “my” new Dream Machine style bridges. As I copied all important Dream Machine specs and made sure to have it milled from best quality solid brass (nothing die cast), the sound will be identical but the look fits better to the other parts – the Schecter bridge has darkened with age, being about 35 years old (see one of the pictures above).
Last not least a few words on the three (!) strap buttons of the Dream Machines (most of them had three but there were also some with two, even in the 1980 Schecter catalogue). My mahogany body already had two holes at the usual positions, so I had to drill two new holes. I used a piece of tape and drilled through it to avoid crackling of wood or finish, something very important when drilling into a laquered body! The distance of these is about 9.5 cm (3 3/4 “) on my guitar. Only thing left to do: filling the unused hole. I used normal gold-plated strap buttons for now. Unfortunately these look rather different to the original ones which were made of raw brass, without laquer and rather dull looking for this reason. Thinking about it, it should not be impossible to make these from raw brass myself … Well, let’s leave something for the future 🙂
Watch out for the the next blog post in this Building a Telecaster Dream Machine series with the full photo album of the final guitar.
Related articles

6 thoughts on “Building a Telecaster Dream Machine – Part 4 – Brass Hardware”
Hello there, Mr. Dream machine (I don’t know your name);
I have an old Schecter Solid, ONE PIECE Indian Laurel Rosewood Telecaster neck.
It is a slim profile neck, much like the middle 50’s Fender Tele’s would be.
I wish to sell it, but do not want to go on ebay or any other sites before I find someone
like yourself who specializes in Schecter equipment.
If you let me know whether you are interested in buying this from me,
please let me know ASAP.
Thank you,
Eric
give me a shout. 🙂
hi. did you ever sell that indian laurel neck? i’d be interested in buying it. please feel free to contact me.
I forgot something, haven’t I?
Is it not legal to sell such a thing to you?
It is INDIAN Laurel Rosewood, and not Brazilian,
so I guess men in riot gear will not need to surround my place just yet….
So please let me know about this. I also have other Van Nuys parts.
Is that gold control plate available in the shop?
Hi I’ve got a really old schecter telecaster colour wise it’s a greeny blue two humbuckers which are controlled by two push pull pots no scratch guard just body coloured really powerful pick ups heavy body light coloured neck schaller pegs towing buttons I bought it about 1980 second hand can you help?